How to Prepare Your Post and Rail Fence for Installation
Preparing your Posts and Rails
Well prepared and protected timber is important for maintaining the durability and longevity of your new Post and Rail fence. Follow our preparation guide below:
As a reference, here at The Wood Project, we typically supply our posts at 2m for a three-rail fence that incorporates 200 x 50 rails which allows for 650mm in ground and 1350mm out of the ground. We supply 1.8m posts for 3 rail fence that incorporates 150x50 rails which allows for 600mm in ground and 1200mm out of the ground.
For a two-rail fence, we supply posts at 1.8m which allows for 600mm in ground and 1200mm out of the ground - this is the case for 200x50mm rails and 150x50 rails
Milled and morticed. This shows how you’ll receive your posts ready for prep and installation.
Step 1: Paint Post Tops
As soon as you receive your timber or Post and Rail kit, paint all mortises and post tops with your choice of fence paint. We recommend doing this immediately, that way you are protecting the post tops as the timber dries out. Because we supply kits, some customers leave their kits waiting for installation, so completing this step immediately upon taking delivery of your order will ensure the longevity of your fence.
Select your choice of fence paint or oil and paint all of your mortises and post tops (the section out of the ground). We recommend Sceney’s Fence Black or Timber & Clear decking oil*.
Step 2: Apply Bitumen Paint
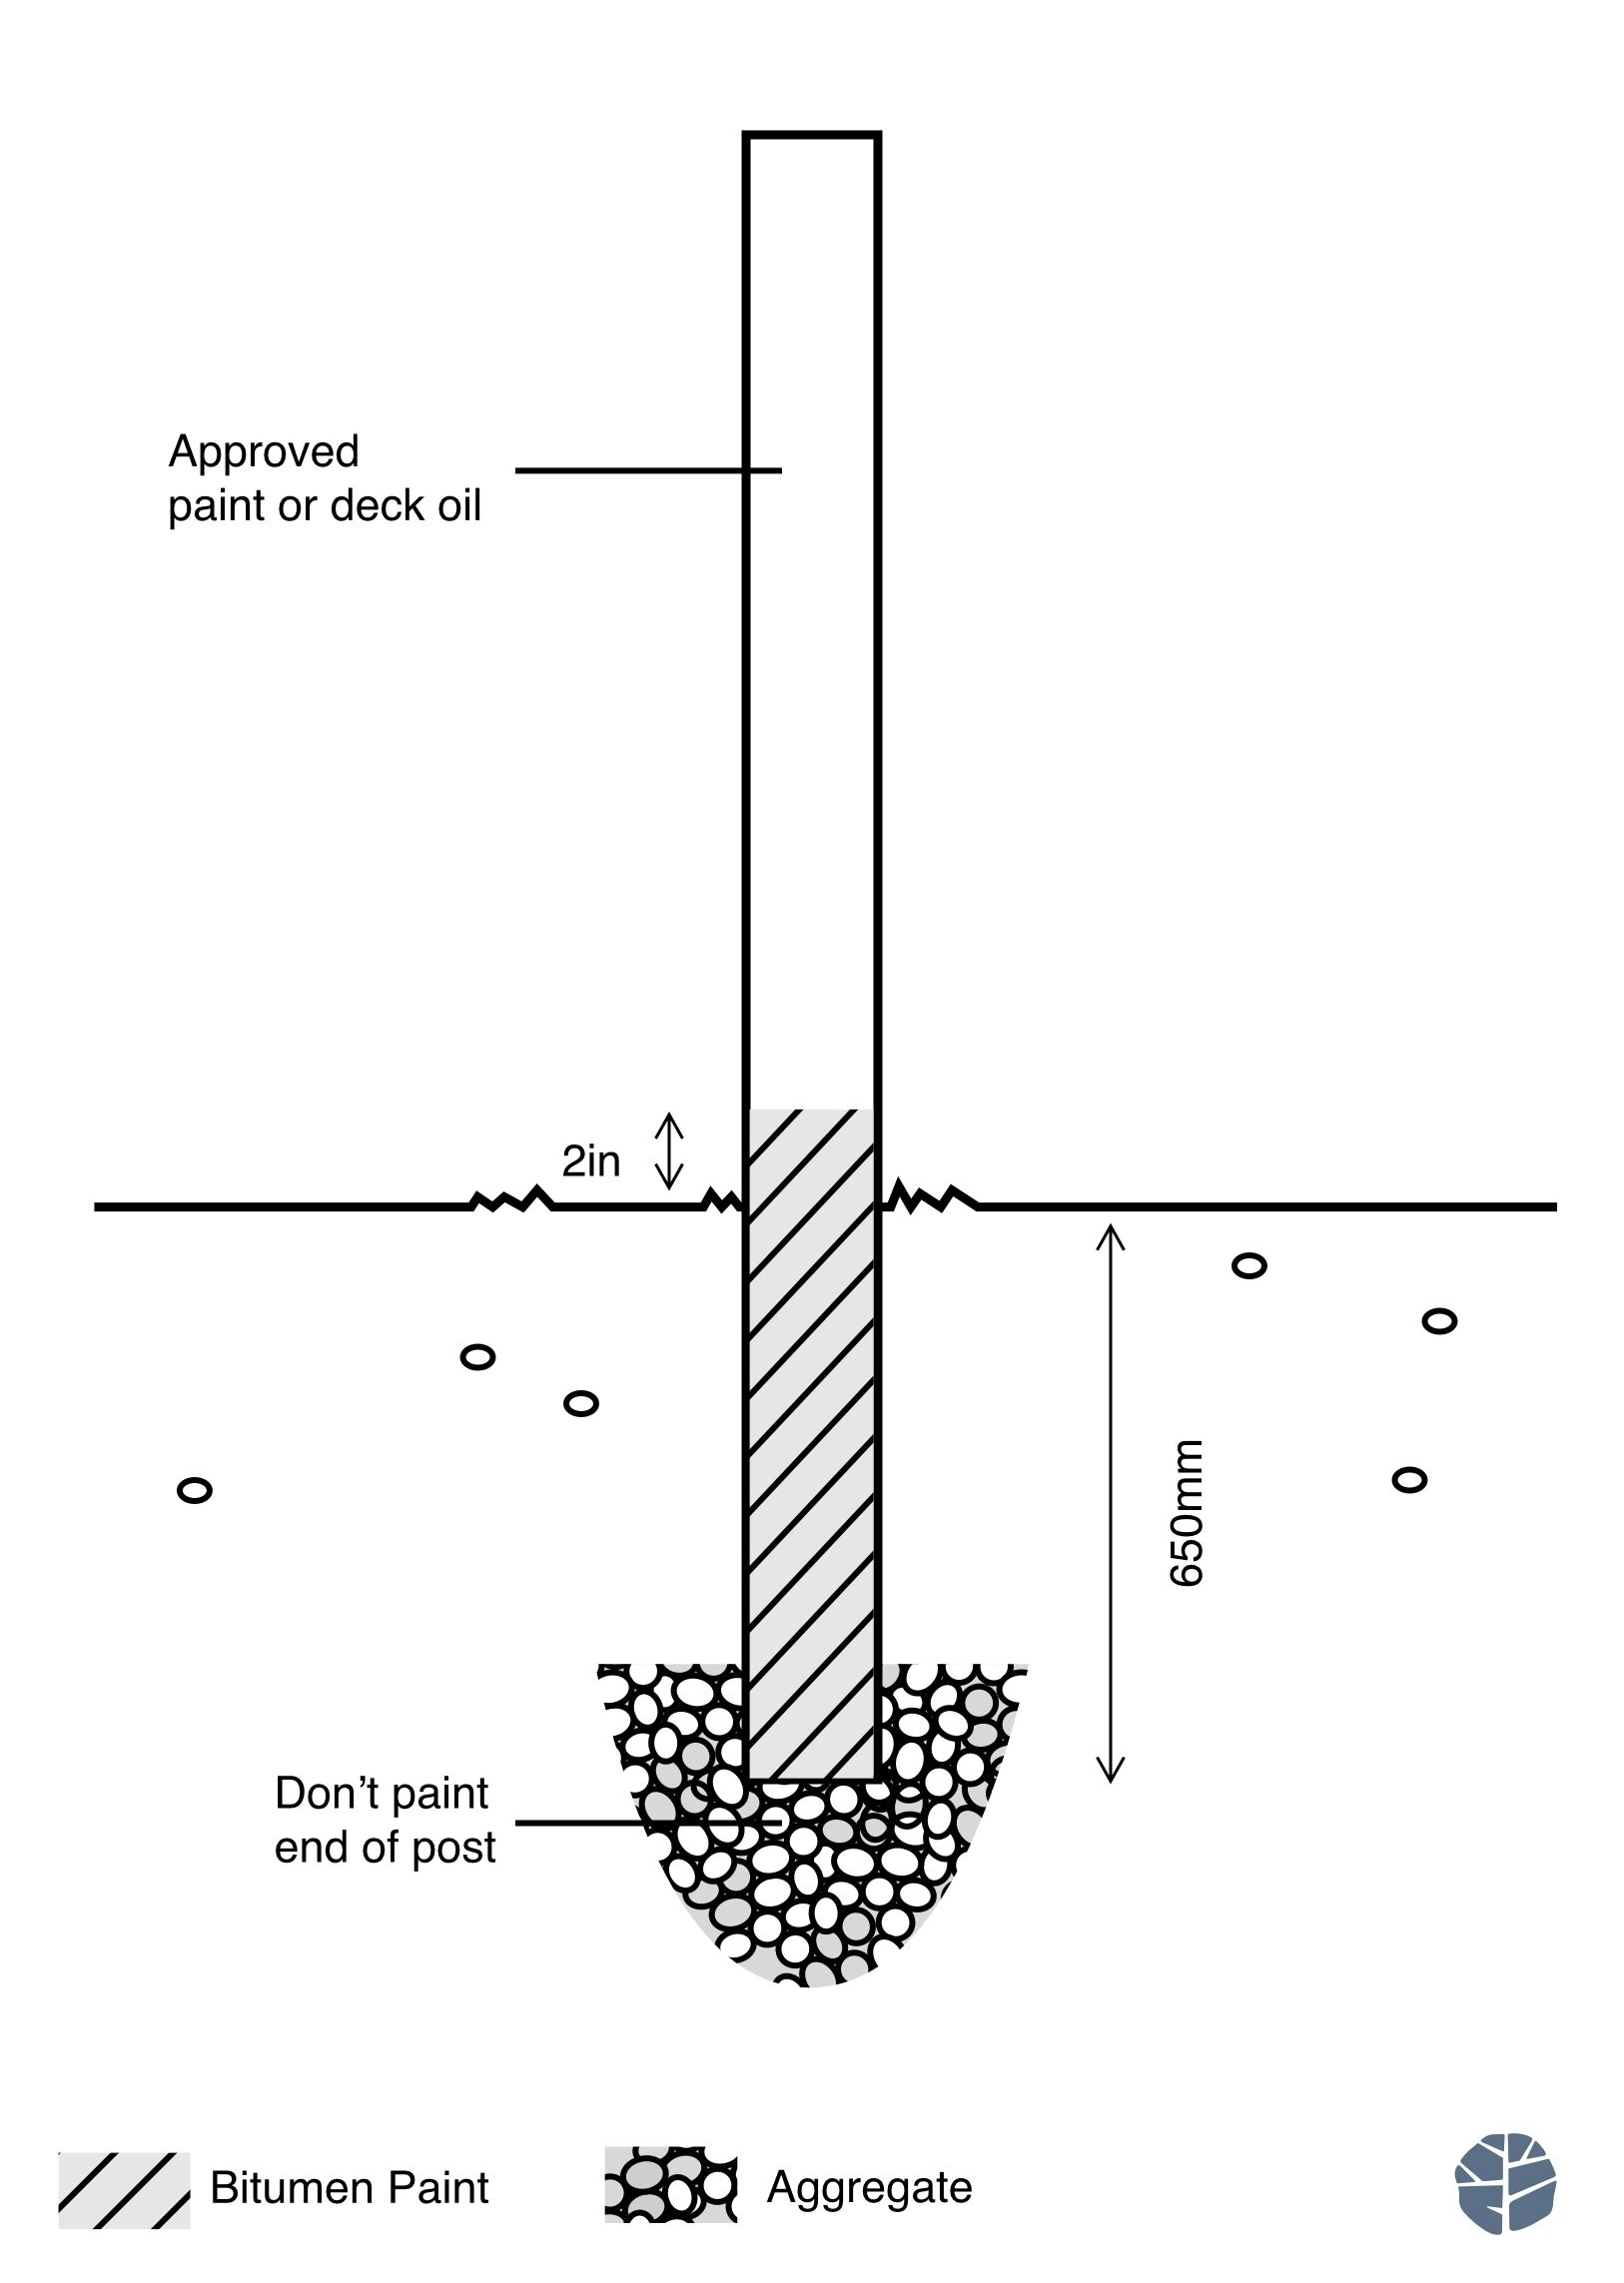
You’ll next want to paint the in-ground portion of the post with bitumen paint* ensuring that you don’t paint the very end of the post. You’ll need to keep the end of the post raw so that moisture within the timber can still drain out from the bottom of the post, to prevent future rotting.
Be sure to finish the height of the bitumen paint at about 2 inches above your intended ground level. The reason for this is that water will commonly pool on the surface of the soil before draining into the ground. This will also prevent the posts from water rot.
Step 3: Trim and Paint Your Rails
Make sure as you are installing your fence, that you also paint the rail ends. Trim down your rails to suit the desired spacing between your posts, and paint the ends of your rails before slotting into your posts. For this, you’ll want to use the same paint or decking oil selected for your posts.
Ready to Install
Follow our Installation Guide for tips on installing your Post and Rail fence.
* All of our recommended paints and oils are available in store, or can be added to your order at the quote stage, just let us know!
A diagram of your finished post preparation.


